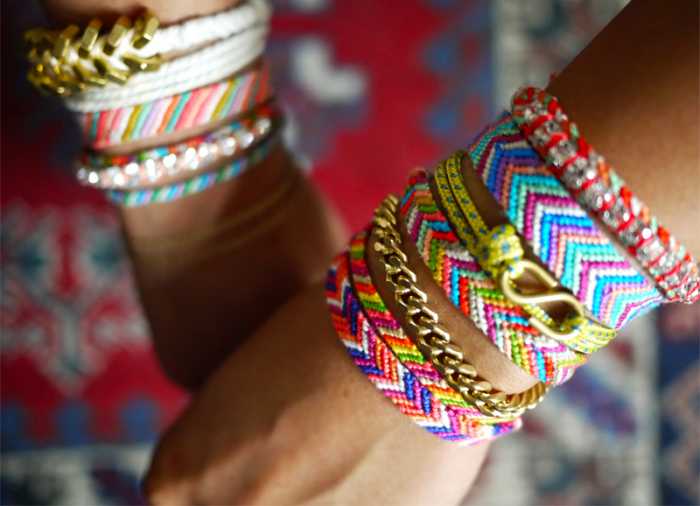
Bracelets threaded with hands can make people feel special if they are your close friends or family members. They are a classic sign of friendship. One doesn’t need any special occasion to gift them bracelets. You can make these bracelets with the leftover things at your home. If you make it perform as a group activity it will add more fun. These DIY ways of making bracelets are easily affordable and are pocket-friendly.
These simple bracelets making ideas are easy to learn in an hour or less and also can make your friendship stronger. One must surely try this bracelet making tips:
Prerequisites: Colourful threads, scissors, pearls and diamonds for decoration (optional)
How To Make Friendship Bracelets Part 1:
- Choose threads of variety of colours: If you want to go or colourful combinations you can use a number of threads. This will make the bracelet look beautiful with a perfect blend of colours. The number of threads you use, the wider the bracelet will appear. You can use a lot of creativity here.
- Measure the length of each thread: Measure the length of thread from your fingertip to shoulder. You will have enough thread to generate a design for your bracelet. It is better if you take a longer thread, so you can cut the exceeded part when not required.
- Tie the threads: Look for a stable and safe place to tie your bracelet so that it does not get damaged. If you cannot find the perfect place to keet it safe, hold it with your toe.
- Spreading of threads: Spread the threads in the way you like the pattern to be. Spreading should be followed immediately after knotting. This will make the threads less bulky. Do not overpass the threads over each tightly.
- Tie the knot: Place the strands over each another to interconnect them by tying the knot. Keep the first thread on the top of the second thread. Keep the first thread following the second one. Keep a hold on one thread while you poll another one. You have successfully tied the first knot.
- Repeat the above process: Use the first thread to join to the third thread and so on. Repeat until every thread has two knots. Make sure that the knots are not too tight as the bracelet will appear uneven and lumpy.
- Make a knot in all the strands from moving left to right. Knot the first thread with each successive strand.
Also check: 40 Best Would You Rather Questions to Reveal More About Your Friends
How To Make Friendship Bracelets Part 2:
- Begin the process again: Once the first round of knots is done, you will start with the other one. The leftover thread will be the first thread. When you are done, every thread will move to the right side. You have to begin with the new thread every time. With the leftover strands, repeat the dual knot process. Keep moving the strand from left to right until it is on the right side.
- There should be enough extra space so that it can be easily wrapped on your wrist. Make sure it fits easily.
- Tie the knot at the second end: Cut the extra part with a pair of scissors, you don’t need and tie the knot at the other end of the bracelet.
- Tie the knot at both ends: Just tie the strands of both the ends together and your bracelet is going to rock.
How To Make Friendship Bracelets Part 3
- Add a braid: To add an extra flair, you can try simple braid. Before the main design, start making a braid. Arrange all the single strings into groups.
- Hold the thread which is on the right side and traverse it over the middle thread. The thread now comes in the centre part. Now hold the thread which is on the left side and place it crossword over the centre thread, now this becomes the centre part. Continue this pattern, first left thread over the centre and then right part over the centre unless you achieve the length of braid you need.
- Tie a knot: When you reach the desired length of the simple braid pattern, you can tie a knot.
- Braid the other end: Complete your bracelet with making a simple braid at the other end.
- Add beads: While breading you can add beads into the threads. You can also decorate it using pearls or diamonds. Make them secure by tying the knot. This can enhance the look of your bracelet. Your bracelet is done. It is ready to gift to your friend or you can also keep it for sale or you can keep it for yourself.
